Training Custom YOLO Models for Segmentation of Bioimages
| Author(s) |
|
| Reviewers |
|
OverviewQuestions:
Objectives:
Why use YOLO for segmentation in bioimage analysis?
How can I train and use a custom YOLO model for segmentation tasks using Galaxy?
Requirements:
Preprocess images (e.g., contrast enhancement, format conversion) to prepare data for annotation and training
Perform manual/human-in-the-loop semi-automated object annotation.
Convert AnyLabeling annotation files into YOLO compatible format for training.
Train a custom YOLO model for segmentation.
- Introduction to Galaxy Analyses
- tutorial Hands-on: FAIR Bioimage Metadata
- tutorial Hands-on: REMBI - Recommended Metadata for Biological Images – metadata guidelines for bioimaging data
Time estimation: 2 hoursSupporting Materials:Published: Jul 25, 2025Last modification: Nov 6, 2025License: Tutorial Content is licensed under Creative Commons Attribution 4.0 International License. The GTN Framework is licensed under MITpurl PURL: https://gxy.io/GTN:T00550version Revision: 5
In bioimages, challenging morphologies are often quite hard to segment using traditional computer vision/image analysis methods. Therefore, using semi-supervised machine learning methods like deep learning for such tasks is getting more popular.
This tutorial shows an easy-to-use and efficient workflow of training YOLO models in Galaxy. The workflow integrates both interactive and headless tools. We demonstrate the workflow here with bright field microscopy images from growing embryo samples. The workflow can also be adapted to other datasets with minimal adjustments.
AgendaIn this tutorial, we will cover:
Get data
Hands On: Data Upload
Create a new history for this tutorial
- Import the following dataset from Zenodo or from the data library.
- Important: Choose the type of data as
zip.https://zenodo.org/records/16096782/files/example-input-images.zip
- Copy the link location
Click galaxy-upload Upload at the top of the activity panel
- Select galaxy-wf-edit Paste/Fetch Data
Paste the link(s) into the text field
Press Start
- Close the window
As an alternative to uploading the data from a URL or your computer, the files may also have been made available from a shared data library:
- Go into Libraries (left panel)
- Navigate to the correct folder as indicated by your instructor.
- On most Galaxies tutorial data will be provided in a folder named GTN - Material –> Topic Name -> Tutorial Name.
- Select the desired files
- Click on Add to History galaxy-dropdown near the top and select as Datasets from the dropdown menu
In the pop-up window, choose
- “Select history”: the history you want to import the data to (or create a new one)
- Click on Import
- Unzip ( Galaxy version 6.0+galaxy0) with the following parameters:
- param-file “input_file”:
example-input-images.zip- “Extract single file”:
All files- Click on Edit galaxy-pencil next to the collection name in your history to rename it to
input-imagesImport the class name file from Zenodo
https://zenodo.org/records/16096782/files/class_names.txt
- Copy the link location
Click galaxy-upload Upload at the top of the activity panel
- Select galaxy-wf-edit Paste/Fetch Data
Paste the link(s) into the text field
Press Start
- Close the window
- Inspect the content of
class_names.txt.
- Click on the title of your file to see the row of small icons for saving, linking, etc.:
- Click on the visualise icon galaxy-visualise and then select the Editor visualization plugin.
Question
- How many classes are there in this class file?
- What are the class names?
- 1
- tail
Preprocessing the images
The example dataset used in this tutorial consists of images in TIFF format. However, the YOLO training tool in Galaxy currently supports only JPEG (JPG) images. Therefore, as a necessary preprocessing step, the input images must be converted to the appropriate format. In this workflow, we first do contrast enhancement using adaptive histogram equalization of the images and then convert them from TIFF to JPG.
It’s important to note that these preprocessing steps are tailored to the example data. When applying this workflow to other images, the specific preprocessing steps may vary. Format conversion is mandatory if the images are not already in JPG, but contrast enhancement or other adjustments may or may not be needed depending on images. Users should adapt this part of the workflow to best suit their own data.
Perform contrast enhancement
Hands On: Normalize Histogram
- Perform histogram equalization ( Galaxy version 0.18.1+galaxy0) with the following parameters:
- param-collection “Input image”:
input-images(Input dataset collection)- “Histogram equalization algorithm”:
CLAHE- Rename galaxy-pencil the output collection to
input-normalized.
Convert image format
Hands On: Convert Format
- Convert image format ( Galaxy version 1.3.45+galaxy0) with the following parameters:
- param-file “Image to convert”:
input-normalized(Input dataset collection, output of Perform histogram equalization tool)- “Transformations”:
Deselect all- “Reduce Color Palette”:
No- “Resize(%)”:
100.0- “Output Format”:
jpg- Rename galaxy-pencil the output collection to
input-converted.
Annotating the images
Once the input images are preprocessed and converted to JPG format, we need to annotate the images. AnyLabeling is an interactive labeling tool integrated into Galaxy that allows users to draw bounding boxes or other shapes around objects of interest.
In this tutorial, we annotate all 22 example images using the tool’s Auto labeling function, which helps accelerate the annotation process. The label files generated from AnyLabeling will later be used to train a YOLO model. The annotation process is entirely human-in-the-loop, so the quality and relevance of the labels directly influence the performance of the resulting model.
Hands On: Interactive Annotation
- Start AnyLabeling Interactive with the following parameters:
- param-file “Input images”:
input-converted(Input dataset collection, output of Convert image format tool)- “Pre-existing annotations”:
Empty- “Classes file”:
Empty- “A tarball containing custom model files and yaml files”:
Empty
- Go to User > Active InteractiveTools
- Wait for the to be running (Job Info)
- Click on
- Once AnyLabeling is open.
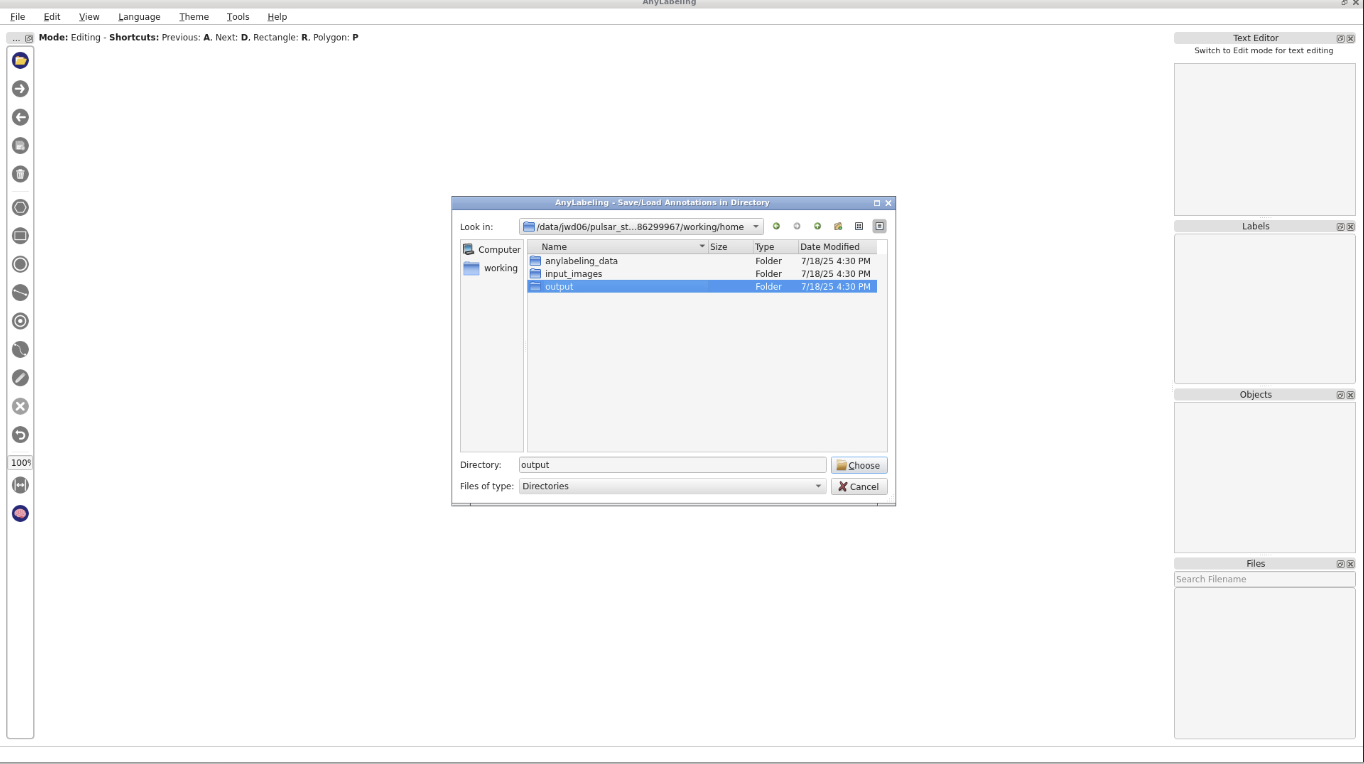
Navigate to
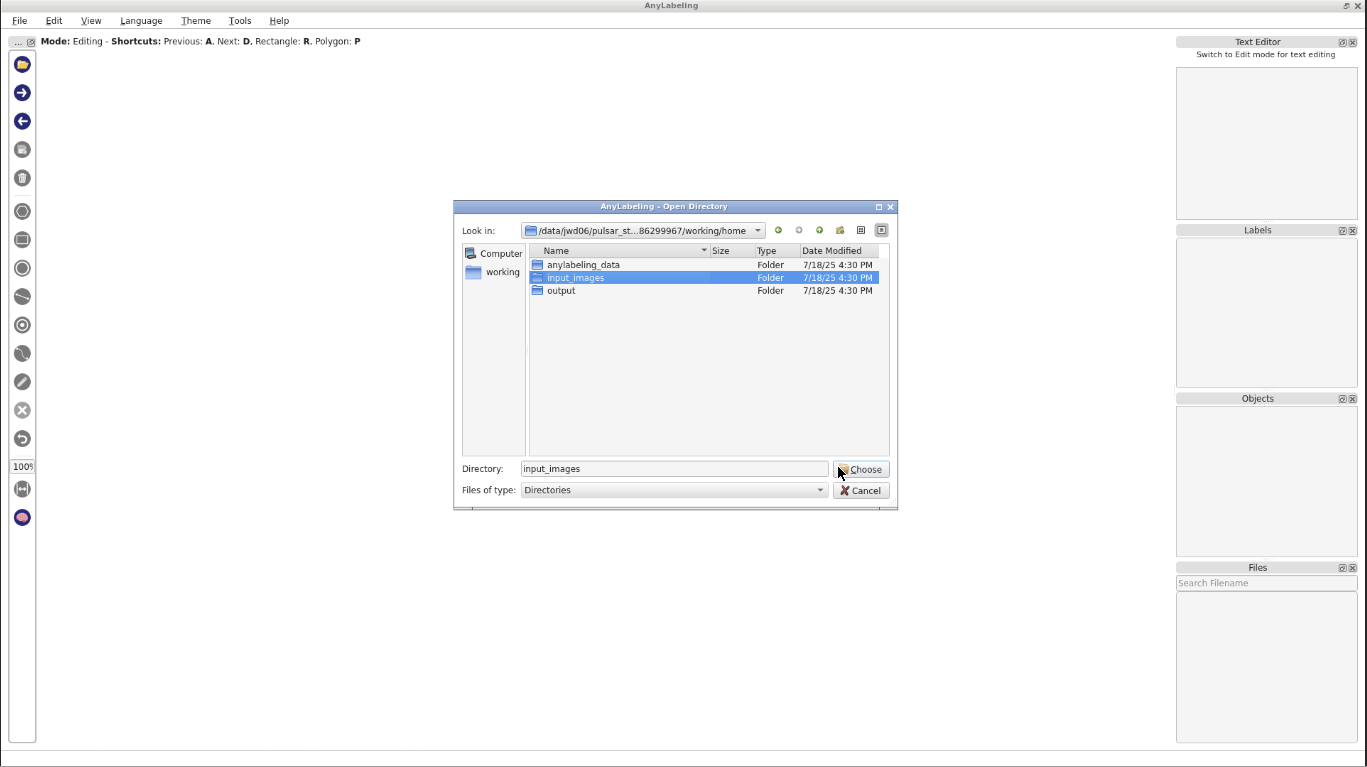
File->Change Output Dirand set the output directory toworking/home/output.To open your input images, go to
File->Open Dir, and chooseworking/home/input_imagesdirectory.
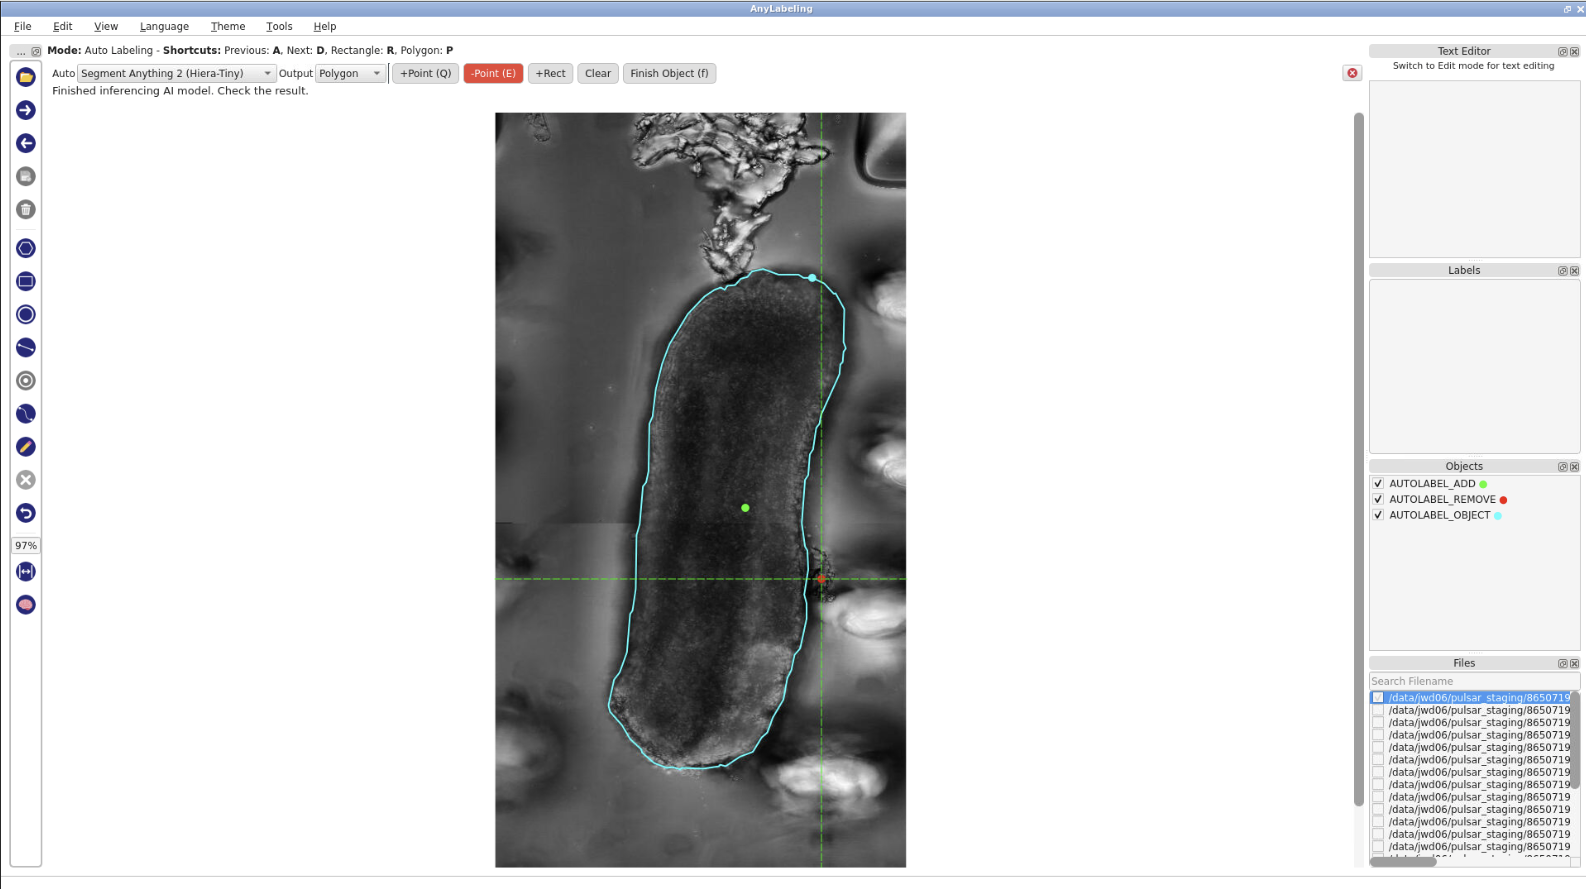
- Click the
Auto Labelingbutton, chooseSegment Anything 2 (Hiera-Tiny)from the model dropdown, select+Point,then begin annotation by clicking on the object in the image. Wait for the inference to complete before continuing.
Note: If the selected auto labeling model falsely detects image background or objects that are not part of the object of interest, we can refine it by adding a “negative point” to indicate image background. Vice versa, if the model does not completely detect the boundaries of the objects, one can add a “positive point” to the area inside the object that was missed by the model.
- In the previous step, the results included some background, as shown in the picture. To refine them, click
-Point, then click on the background area. The model will re-run the inference.
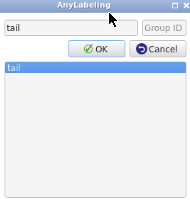
- After the inference is complete, click
Finish Object. In theEnter object labelbox, typetailthen clickOK. This will automatically create a label file in JSON format that contains the coordinates of the polygon.
- Important: The object label must match the content of
class_names.txt.- Repeat these steps for each image in the dataset to complete the interactive annotation process.
- Close the tool.
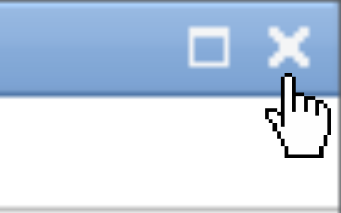
Once you have finished annotating all your images, you can safely close the interactive environment.
Click on the small cross at the top-right corner of the AnyLabeling window.
Wait a few moments for the interface to close completely and return to the Galaxy workspace.

Prepare training data
In this step, we will convert the annotation file generated by AnyLabeling (in JSON format) into YOLO compatible TXT files. This conversion is necessary because the YOLO training tool expects annotations in its specific text format, where each object is described by a class ID and corresponding bounding box coordinates. The YOLO TXT file must be formatted according to the described specifications.
Hands On
- Convert AnyLabeling JSON to YOLO text ( Galaxy version 8.3.0+galaxy2) with the following parameters:
- param-file “Input label files”:
al_output(output of AnyLabeling Interactive tool)- param-file “Class file”:
class_names.txt(Input dataset)- Rename galaxy-pencilthe output collection to
yolo-files
Train a YOLO model
Hands On:In this step, we will train a custom YOLO model for segmentation using the prepared images and annotation files.
- Perform YOLO training ( Galaxy version 8.3.0+galaxy2) with the following parameters:
- param-file “Input images”:
input-converted(output of Convert image format tool)- param-file “Input YOLO txt files”:
yolo-files(output of Convert AnyLabeling JSON to YOLO text tool)- param-file “Model URL”:
YOLO11n-seg- In “Training Parameters”:
- “How do you want to split your images for training.”:
70- “Number of epochs for taining.”:
50- “Image size”:
512- “Image scale augmentation”:
0.8- “Image rotation augmentation”:
10.0- “Image HSV-Value”:
0.5- “Image HSV-Saturation”:
0.7- “Image HSV-Hue”:
0.015- “Learning rate”:
0.02- “Weight decay”:
0.001- “Confidence”:
0.5- “IoU”:
0.7- “Max. number of detection”:
300
Question
- What output files are generated after training?
- How do training parameters affect model performance?
- What happen if the Confidence threshold increase or decrease?
- The training step produces the best model, last model, training metrics, and a training plot.
Number of epochs: A higher number allows the model to learn more thoroughly but takes longer.
Image size: Determines the resolution used during training. Larger sizes can improve accuracy but require more memory and time.
Image scale augmentation: Resizes images by a random factor within the specified range. The scale hyperparameter defines the scaling factor, with the final adjustment randomly chosen within the range of [1–scale; 1+scale]. For example, with scale=0.5, the scaling is randomly selected within 0.5 to 1.5.
Image rotation augmentation: Rotates images randomly within the specified range. The degrees hyperparameter defines the rotation angle, with the final adjustment randomly chosen between –degrees and +degrees. For example, with degrees=10.0, the rotation is randomly selected within –10.0 to +10.0.
Image HSV-Value: Changes the brightness of the image. The hsv_v hyperparameter defines the shift magnitude, with the final adjustment randomly chosen between –hsv_v and +hsv_v. For example, with hsv_v=0.4, the intensity is randomly selected within –0.4 to +0.4.
Learning rate: Controls how fast the model learns. If training is unstable or not improving, try lowering this (e.g., to 0.01 or 0.005).
Weight decay: Helps prevent overfitting by penalizing large weights. Usually works well between 0.0001 and 0.01.
- This value governs the minimum confidence threshold for detections. Objects detected with a confidence below this threshold will be disregarded. Adjusting this value can help reduce false positive detections.
Extract complete training workflow from history
As an optional step, you can extract a complete workflow from your Galaxy history. This allows you to save and reuse the entire training process as a reproducible and shareable workflow.
Clean up your history: remove any failed (red) jobs from your history by clicking on the galaxy-delete button.
This will make the creation of the workflow easier.
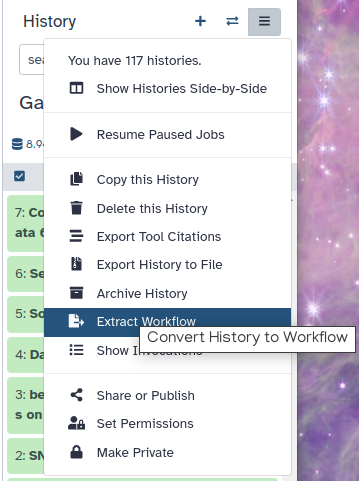
Click on galaxy-gear (History options) at the top of your history panel and select Extract workflow.
The central panel will show the content of the history in reverse order (oldest on top), and you will be able to choose which steps to include in the workflow.
Replace the Workflow name to something more descriptive.
Rename each workflow input in the boxes at the top of the second column.
If there are any steps that shouldn’t be included in the workflow, you can uncheck them in the first column of boxes.
Click on the Create Workflow button near the top.
You will get a message that the workflow was created.
Using the trained model to label new images
Once training is complete, the resulting model can be used to label new images. The process of applying the trained model for inference is covered in a separate tutorial. Please refer to that tutorial for detailed instructions on how to use the model for prediction.
Conclusion
This tutorial demonstrated how to train a custom YOLO model for segmentation of bioimages using Galaxy. By combining image preprocessing, human-in-the-loop annotation, format conversion, and model training, we have built a complete workflow. We can apply the trained model to new image data and further refine our workflow as needed.
You've Finished the Tutorial
Key points
Image preprocessing (e.g., histogram equalization) can enhance model performance but may not be necessary for all datasets
The accuracy and consistency of human annotations directly impact the quality of the trained YOLO model.
Training metrics, the output of the YOLO training tool, are essential for evaluating model performance and guiding improvements.
Frequently Asked Questions
Have questions about this tutorial? Have a look at the available FAQ pages and support channelsUseful literature
Further information, including links to documentation and original publications, regarding the tools, analysis techniques and the interpretation of results described in this tutorial can be found here.
Feedback
Did you use this material as an instructor? Feel free to give us feedback on how it went.
Did you use this material as a learner or student? Click the form below to leave feedback.

Citing this Tutorial
- Yi Sun, Arif ul Maula Khan, Training Custom YOLO Models for Segmentation of Bioimages (Galaxy Training Materials). https://training.galaxyproject.org/training-material/topics/imaging/tutorials/yolo-segmentation-training/tutorial.html Online; accessed TODAY
- Hiltemann, Saskia, Rasche, Helena et al., 2023 Galaxy Training: A Powerful Framework for Teaching! PLOS Computational Biology 10.1371/journal.pcbi.1010752
- Batut et al., 2018 Community-Driven Data Analysis Training for Biology Cell Systems 10.1016/j.cels.2018.05.012
Congratulations on successfully completing this tutorial!@misc{imaging-yolo-segmentation-training, author = "Yi Sun and Arif ul Maula Khan", title = "Training Custom YOLO Models for Segmentation of Bioimages (Galaxy Training Materials)", year = "", month = "", day = "", url = "\url{https://training.galaxyproject.org/training-material/topics/imaging/tutorials/yolo-segmentation-training/tutorial.html}", note = "[Online; accessed TODAY]" } @article{Hiltemann_2023, doi = {10.1371/journal.pcbi.1010752}, url = {https://doi.org/10.1371%2Fjournal.pcbi.1010752}, year = 2023, month = {jan}, publisher = {Public Library of Science ({PLoS})}, volume = {19}, number = {1}, pages = {e1010752}, author = {Saskia Hiltemann and Helena Rasche and Simon Gladman and Hans-Rudolf Hotz and Delphine Larivi{\`{e}}re and Daniel Blankenberg and Pratik D. Jagtap and Thomas Wollmann and Anthony Bretaudeau and Nadia Gou{\'{e}} and Timothy J. Griffin and Coline Royaux and Yvan Le Bras and Subina Mehta and Anna Syme and Frederik Coppens and Bert Droesbeke and Nicola Soranzo and Wendi Bacon and Fotis Psomopoulos and Crist{\'{o}}bal Gallardo-Alba and John Davis and Melanie Christine Föll and Matthias Fahrner and Maria A. Doyle and Beatriz Serrano-Solano and Anne Claire Fouilloux and Peter van Heusden and Wolfgang Maier and Dave Clements and Florian Heyl and Björn Grüning and B{\'{e}}r{\'{e}}nice Batut and}, editor = {Francis Ouellette}, title = {Galaxy Training: A powerful framework for teaching!}, journal = {PLoS Comput Biol} }
You can use Ephemeris's
shed-tools installcommand to install the tools used in this tutorial.shed-tools install [-g GALAXY] [-a API_KEY] -t <(curl https://training.galaxyproject.org/training-material/api/topics/imaging/tutorials/yolo-segmentation-training/tutorial.json | jq .admin_install_yaml -r)Alternatively you can copy and paste the following YAML
---
install_tool_dependencies: true
install_repository_dependencies: true
install_resolver_dependencies: true
tools:
- name: graphicsmagick_image_convert
  owner: bgruening
  revisions: 8f46605c84ec
  tool_panel_section_label: Convert Formats
  tool_shed_url: https://toolshed.g2.bx.psu.edu/
- name: 2d_histogram_equalization
  owner: imgteam
  revisions: b1c2c210813c
  tool_panel_section_label: Imaging
  tool_shed_url: https://toolshed.g2.bx.psu.edu/
- name: unzip
  owner: imgteam
  revisions: 57f0914ddb7b
  tool_panel_section_label: Collection Operations
  tool_shed_url: https://toolshed.g2.bx.psu.edu/